There is a lot to love about HubSpot’s new CMS Hub Professional, namely, that it offers marketers the flexibility to easily build beautiful (and functional) websites. It’s one of the main reasons we’ve used the CMS for over 10 years as a Platinum Solutions Partner. With the new drag n drop modules and themes, we have even more elbow room to get creative. It may seem a bit overwhelming at first, but have no fear! We've compiled a list of pro tips when using the HubSpot CMS to help you set up your account and start building your website.
Use As Few Themes as Possible In Your HubSpot Account
Set Your HubSpot Global Theme Styles First
Use Appropriate Image Sizes For Your HubSpot Pages And Templates
Limit The Number Of Web Fonts Across All HubSpot Pages
Assign System Page And Blog Templates in HubSpot
Set Up Your HubSpot Color Picker Favorites
Tip 1: Use As Few Themes as Possible In Your HubSpot Account
Less is more when it comes to themes. Themes in the HubSpot CMS assists you in creating visual consistency throughout your website. This will keep you on track as you build different types of pages and ensure a positive user experience.
It may be tempting to download all of the themes, but we encourage you not to do that. Use as few themes as possible to keep your website consistent. Aim to have one theme, preferably one created by a developer, or choose a customized version of one of HubSpot's pre-built themes.
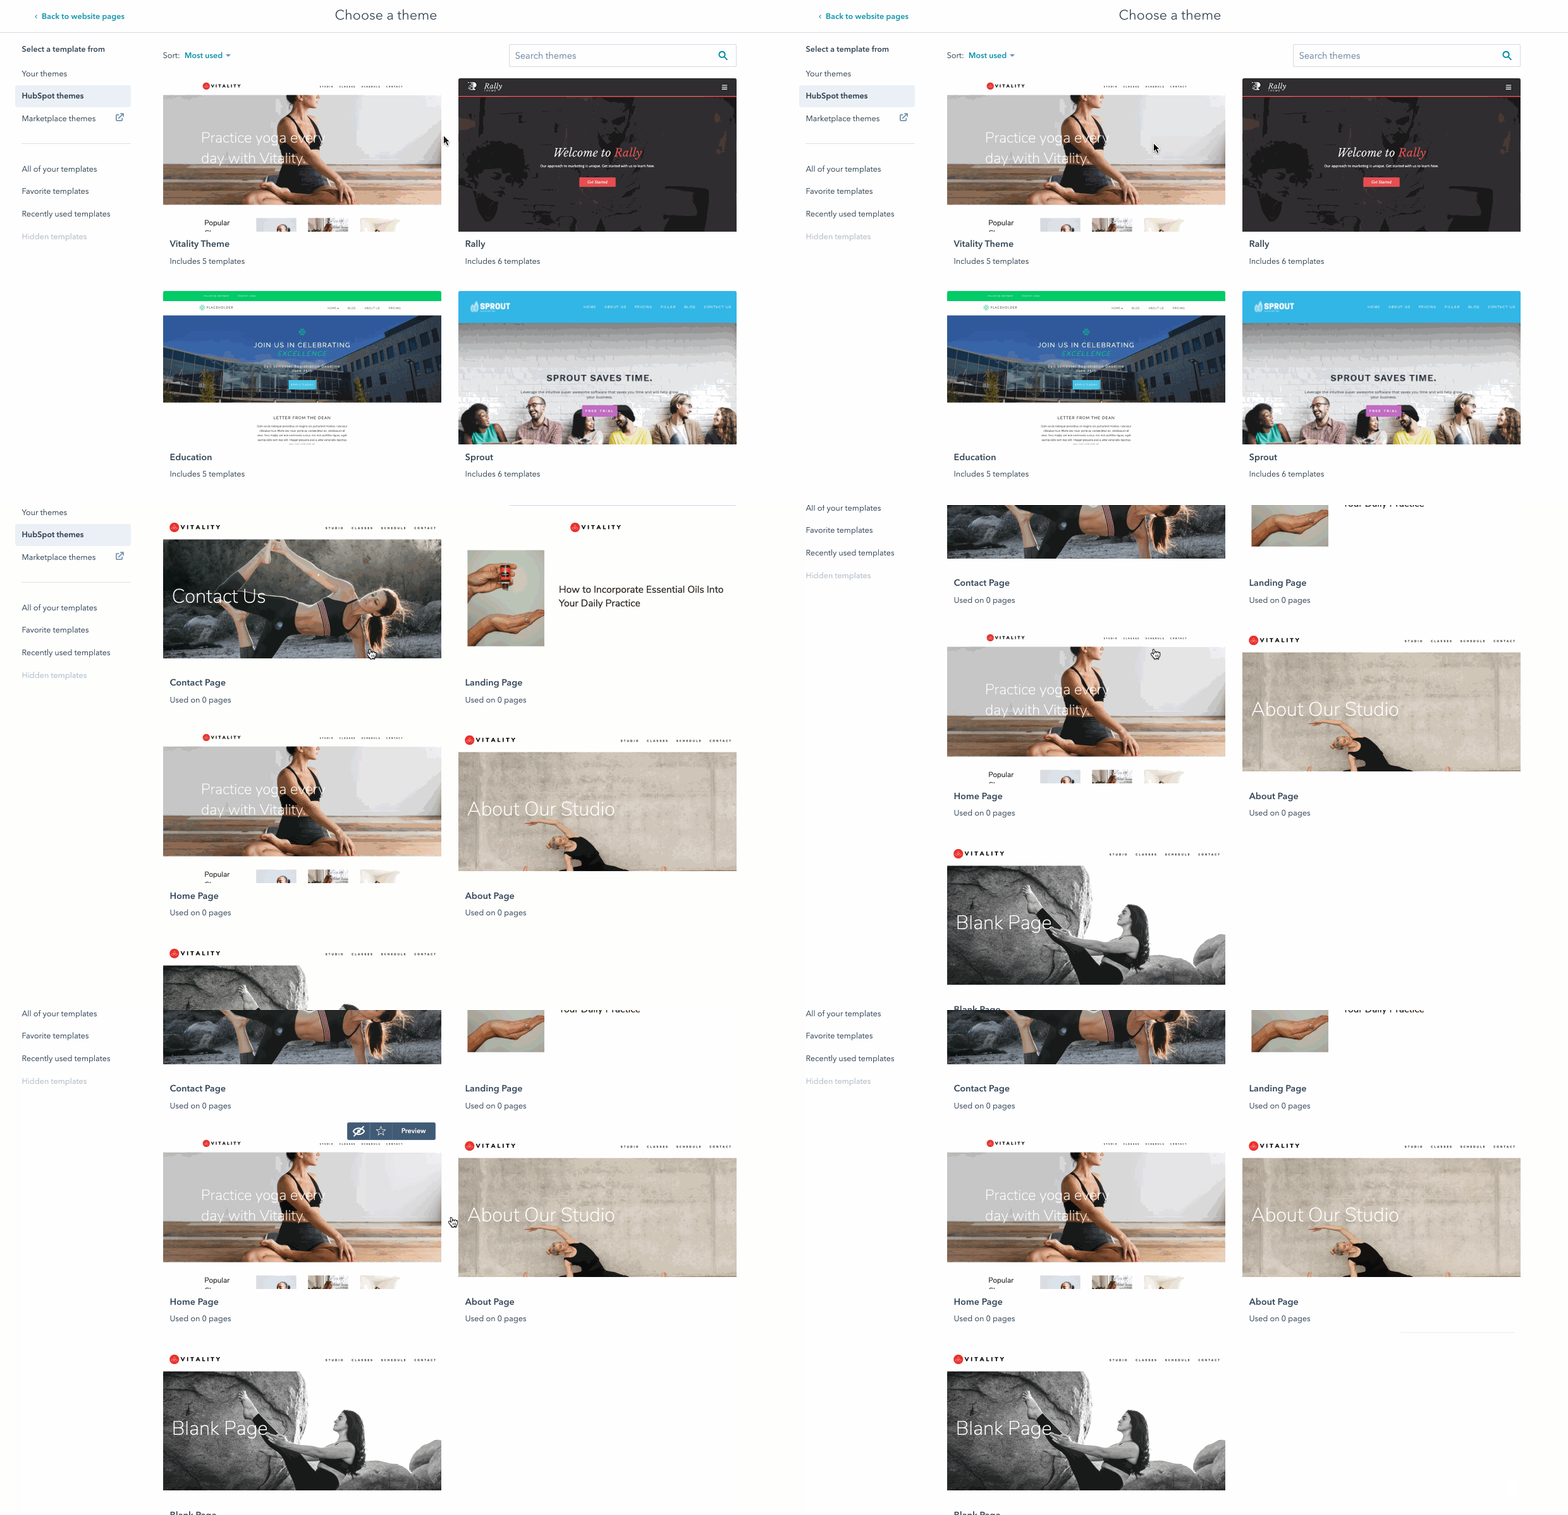
If you'd like to try a different theme for a landing page or specific campaign you're running, go for it! Just use your best judgment and don't go nuts with your website pages.
Now let's drive into the nitty-gritty. All default HubSpot website themes include the following:
- Templates: a set of templates for your website, including a homepage, about page, landing page, and blog templates.
- Modules: a set of unique theme modules you can add and customize on any page template in that theme.
- Theme settings: default settings for your theme's templates, including fonts, spacing, and colors.
- Global content: theme templates include global content, like your website footer, which is repeated on multiple pages.
Tip 2: Set Your HubSpot Global Theme Styles First
Do yourself a huge favor—set your global theme styles before creating content. That way you'll have brand colors, fonts and other styles at the ready. This is going to save you a lot of time and keep your site cohesive.
Steps To Creating Your Theme Styles:
- Create a new page and in the page editor, navigate to the Design tab.
- Select “edit theme settings.”
- Set all of your theme settings to determine your website’s styles.
Pro Tip Within A Tip: Are you working with a CMS developer? If so, they may have set these theme settings for you. Check with them before making any changes.
Tip 3: Use Appropriate Image Sizes For Your Pages And Templates
This one seems a bit obvious, but hear us out! We all know that images and graphics play a huge part in conveying your brand, but on a website, they can also significantly impact user experience.
Having a correctly sized image will help your pages load faster. So while the largest size may look the very best it's also forcing your users to wait, possibly long enough to change their mind about being on your site.
For the best image quality, upload images at the correct dimensions. If the template calls for a 130px by 130px logo, then that's the exact size you should be adding to the file manager.
You have three options available to you for editing and cropping images:
- Your team designer. It will be easy peasy for them to make any changes you need!
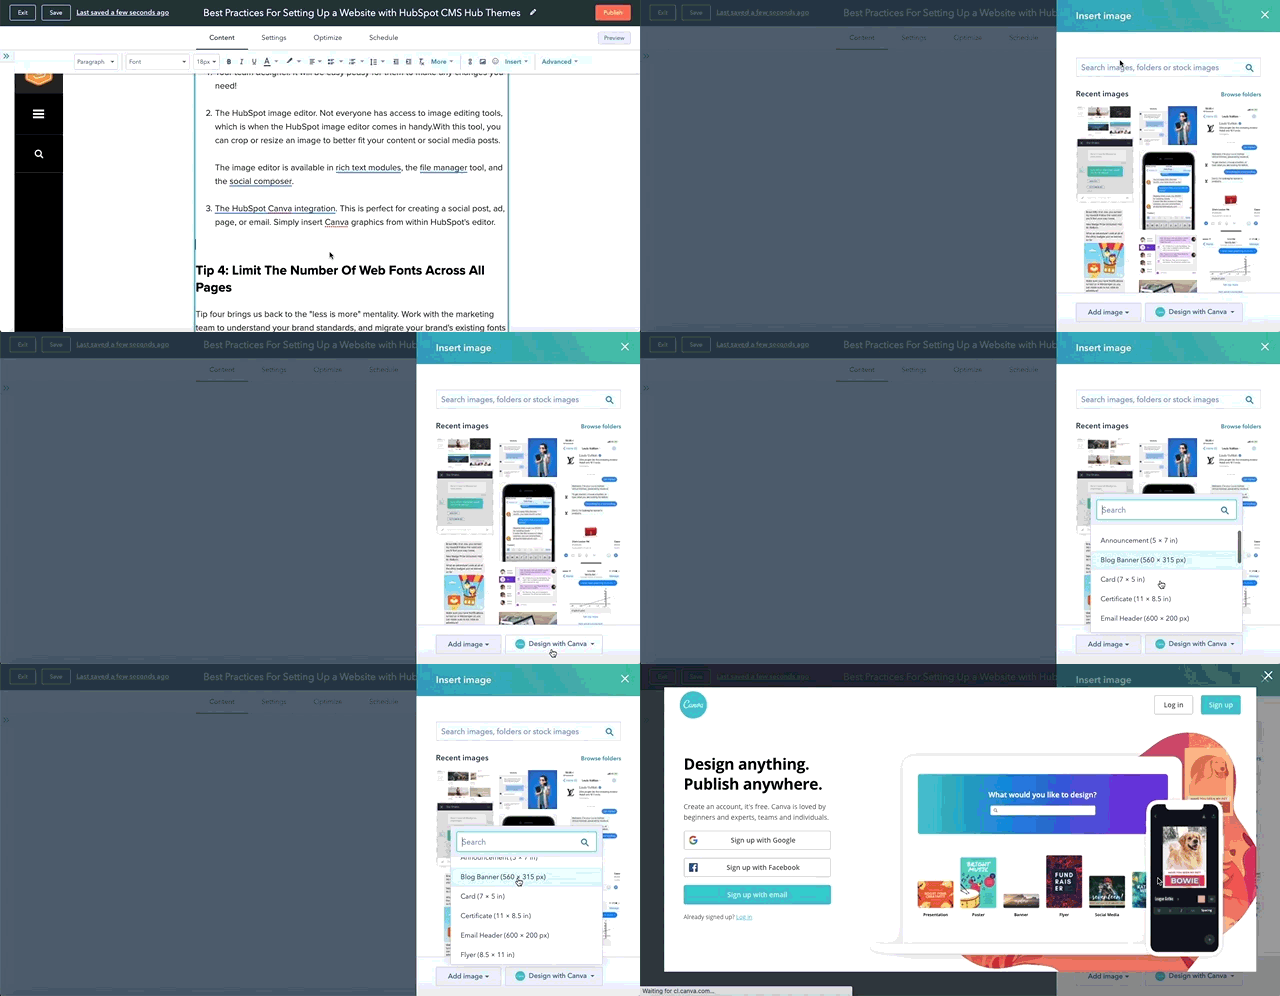
- The HubSpot image editor. Not everyone has access to image editing tools, which is when the HubSpot image editor comes in handy.With this tool, you can crop or resize an image to better fit your content or social media posts.
The image editor is available in rich text modules, the file manager tool, and the social composer. - The HubSpot Canva integration. This is perfect for creating a social post, ad, page, or email. Simply insert Canva graphics from within HubSpot's editor.
Tip 4: Limit The Number Of Web Fonts Across All Pages
 Tip four brings us back to the "less is more" mentality. Work with the marketing team to understand your brand standards, and migrate your brand's existing fonts over to the website. Ideally, you'll want a primary font and a secondary font. You can set these up in your theme settings. Once your chosen fonts are in the theme settings, they can be used in headers, forms, buttons, body copy and pretty much everywhere else.
The theme settings support all Google fonts. From there you can customize font colors in the color bubble, or use the advances tab to add a specific hexadecimal value with a color picker.
Tip 5: Assign System Page And Blog Templates
Let's talk system pages and blog templates. A system page is simply a standard website page, such as an error page or search results page.
What are the types of system page templates in HubSpot?
- Error page: 404 and 500 error pages to let your users know that they have reached a page that does not exist or a technical issue has occurred.
- Password prompt page: a password prompt page for any content you've locked with a password.
- Subscription page: the subscription preferences page where your email recipients can manage the email types they are subscribed to and unsubscribe from all emails. Update this template to engage with your contacts during the subscription process (e.g., explain how your contacts can opt back in to particular email types so they can resubscribe if they change their mind).
- Backup unsubscribe page: a page that will appear for email recipients who are trying to unsubscribe, if HubSpot is unable to determine their email address.
- Subscriptions update page: the confirmation page that appears when an email recipient updates their subscription preferences.
- Search results page: the page that displays search results when visitors use the site search.
To set a template for these pages go to Settings > Website > Pages > System Pages. Similarly, set your blog templates by navigating to Settings > Website > Blog > Templates.
Pro Tip Within A Tip: We recommend using a blog template that matches your website theme.
Tip 6: Set Up Your Color Picker Favorites
Don't want to be copying and pasting your specific hexadecimal value with the color picker all the time? Of course you don't! That's why we recommend setting your brand colors as favorites in the color picker. That way you'll always have the correct colors on hand when creating content. You can have up to six colors favorited, so choose wisely!
To set favorites in the color picker, go to Settings > Marketing > Email > Configuration, scroll down to “Color” and find “Color picker favorites.”
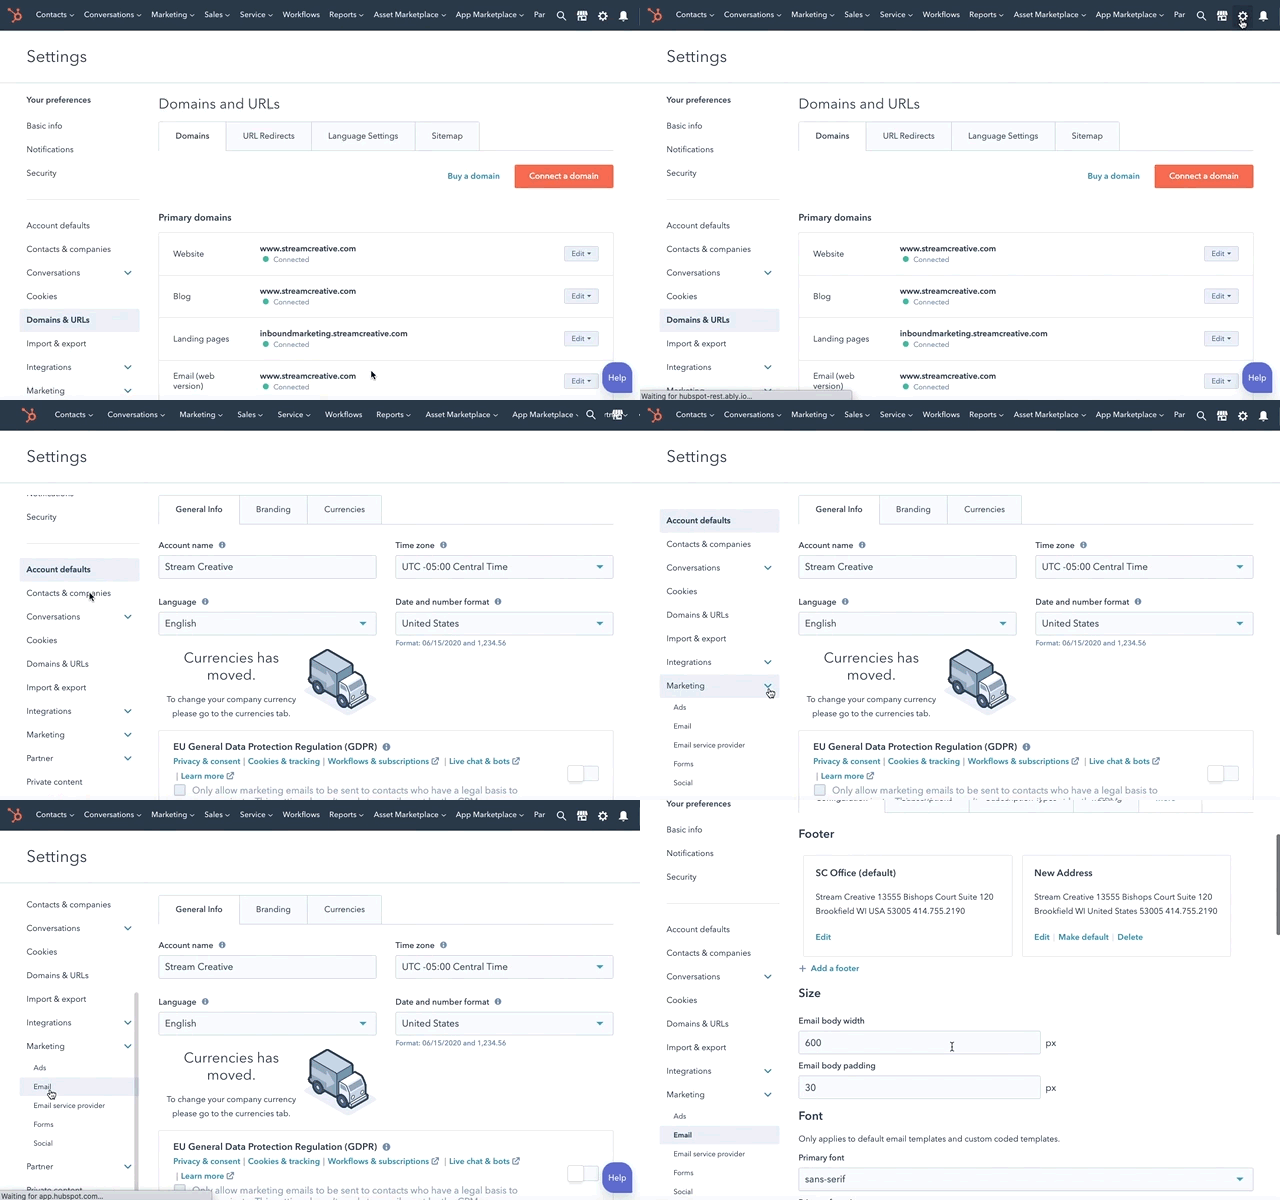
It may seem a little confusing that it's under "email", but these colors will show up in all your web page tools.
Pro Tip Within A Tip: Have your brand standards guide ready or ask your design for a list of your brand hex colors before getting to this section.
Tip 7: Create a Content Mapping Plan
You don't want to get lost in the intricate process of content integration, so you'll need a map. Or rather, a mapping plan.
We would suggest mapping out your plan in two general steps:
- Review and compare your templates and page layout. Be sure to take into account the copy on your existing site.
- Review modules that are available in your theme. Take this opportunity to consider how the copy on your current site is being used. Could it be trimmed down? Would it work better split between two different types of modules?

So there we go! Seven simple best practices to set you up for success when using your HubSpot CMS hub. We hope they guide you well through your website building journey.
Are you looking for more HubSpot and marketing tips and insights? One of our recent blogs may be of help:
- Hubspot campaign best practices and tutorial 2020
- HubSpot CMS Hub Professional vs Enterprise Features and Pricing Comparison (2020)
- Video Marketing for Manufacturers: Expert Tips and Tricks
If you have more specific questions or are looking for marketing advice in general, we encourage you to reach out to us! We're always happy to help.


